How to build a sales pipeline and its stages
Create your sales pipeline in Kamay and adjust the name, color and probability of each stage, plus the pipeline that is chosen by default.
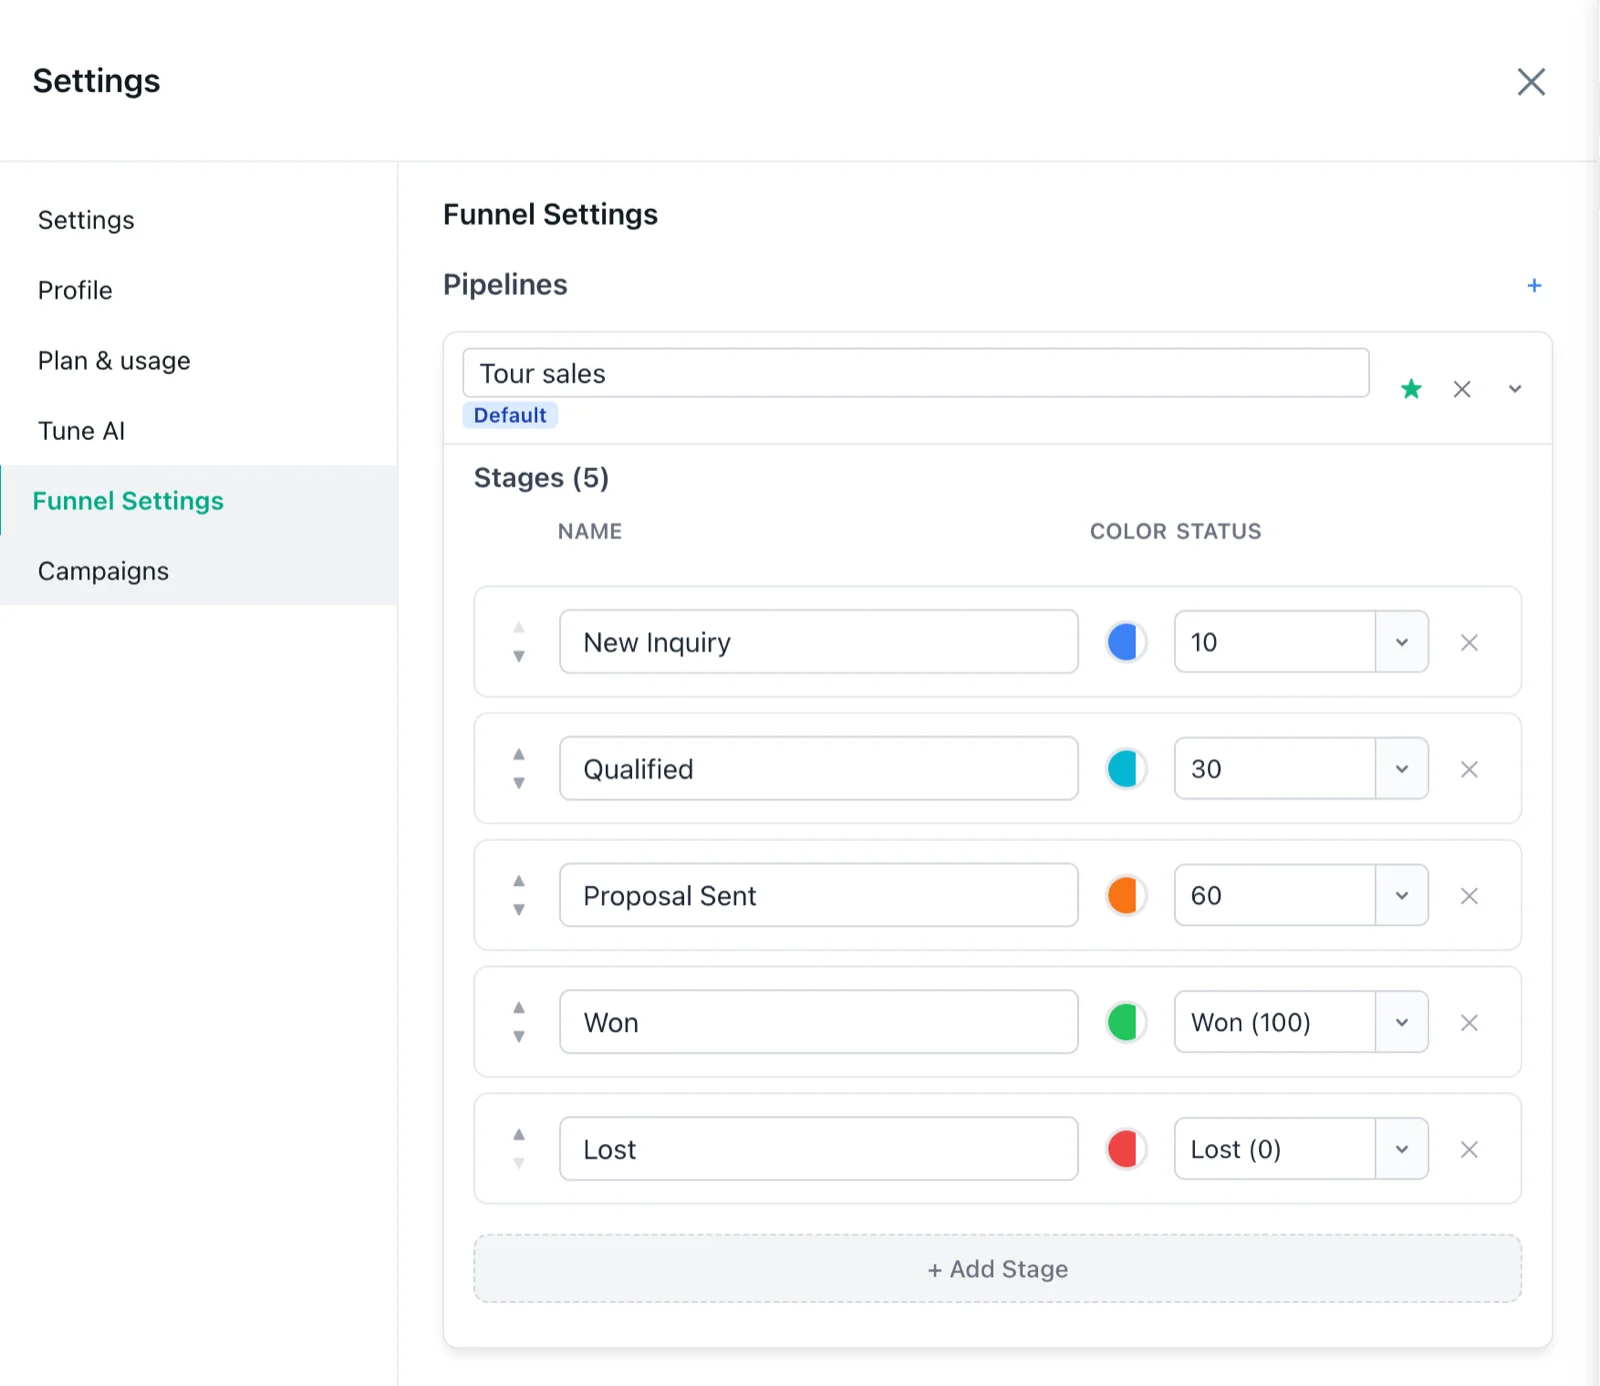
To create a sales pipeline in Kamay, or change the one you already have, go to Settings › Funnel Settings. There you define the stages each customer goes through, with their name, color and closing probability. Changes are saved automatically, with no save button.
The pipeline you start with
Your account starts with a pipeline already created, with the stages from the template you chose when you signed up. With General, the recommended one, there are five: New Inquiry (10%), Qualified (30%), Proposal Sent (60%), Won (100%) and Lost (0%). With Sales, Bookings or Services, you get the stages from that template. Templates are only offered during setup, as explained in how to get started with Kamay.
Most of the time, adapting it is enough. A tour agency in Cusco, for example, can call it “Tour sales” and keep its five stages.
1. Open the pipeline settings
- Click Settings, at the top of the Kamay bar.
- Go to Funnel Settings.
- Click a pipeline to expand it. Its name becomes editable: change it and it’s saved when you leave the field.
2. Set up each stage of the sales pipeline
Each row is a stage, in the same order as the columns of the board:
- Name: type over the current one.
- Color: paints the stripe of the column and the border of its cards on the board.
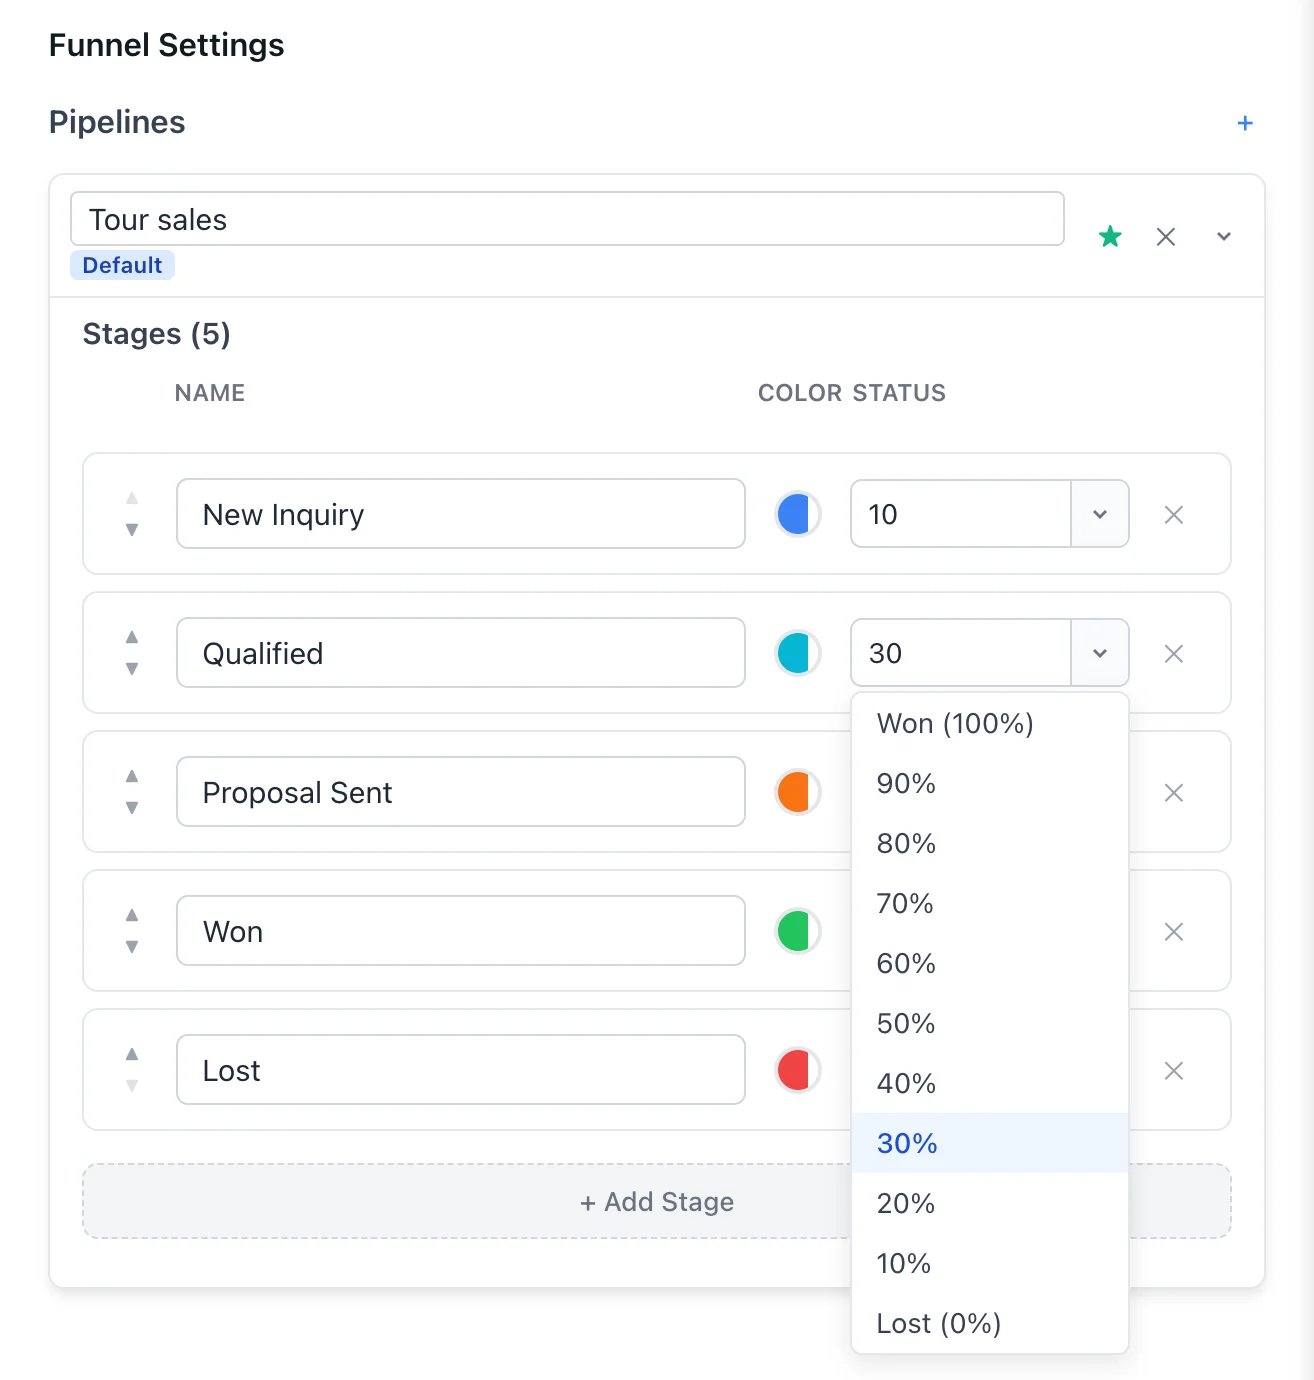
- Status: choose Won (100%), a probability from 90% to 10%, or Lost (0%). You can also type the number. The probability calculates the weighted value on the board, and the 100% and 0% stages are the ones that close a lead, as explained in how to mark a sale as won or lost.
- ▲ and ▼: move the stage up or down.
- ✕: deletes it, after you confirm with Delete. Read the warning at the end first.
+ Add Stage adds a stage at the end, with 10%. It is named “Nuevo Stage 1”, in Spanish whatever language you use: rename it and move it up with ▲ to where it belongs.
3. Check that it’s valid
The pipeline needs at least one open stage, one won stage and one lost stage, and no two stages can have the same name. If something is wrong, you’ll see ”⚠ Invalid configuration” with the reason below it. That warning doesn’t stop you from saving, so fix it right away: without a won or lost stage you’ll have nowhere to close your leads.
For the same reason, Kamay doesn’t let you delete the last stage of a type and warns you with “Cannot delete: at least one stage of this type is required.”
4. Create another pipeline
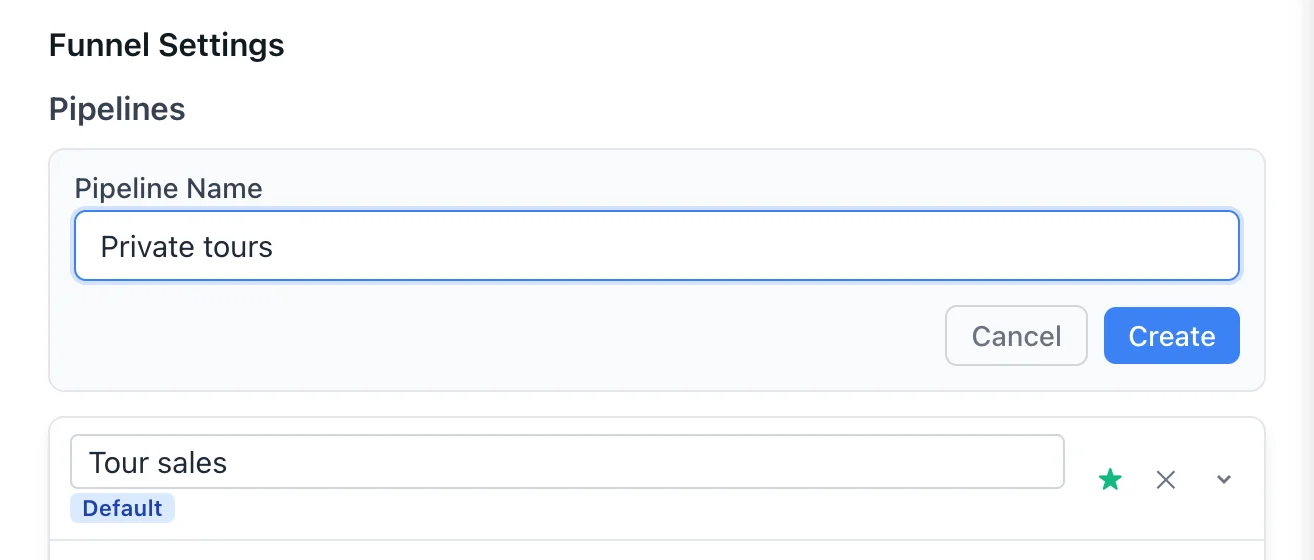
- Click + next to Pipelines.
- Type the Pipeline Name and click Create.
- The new pipeline comes with seven stages: New (10%), Contact (20%), Qualified (40%), Proposal (60%), Negotiation (80%), Won (100%) and Lost (0%). Adjust them as in step 2.
The Free, Beta and Standard plans include one pipeline; Pro allows several. If your plan doesn’t allow more, you’ll see “Error creating pipeline.” and a notice about your plan. Compare plans on Pricing.
5. Choose the default pipeline
The star ☆ (Set as default) makes that pipeline the default and gives it the Default label. It’s the one that appears selected when you create a lead from a chat.
Before deleting a stage or a pipeline
The ✕ next to a pipeline’s name deletes it. You can’t delete the only pipeline you have or the default one: set another as default first.
Move its leads to another stage first. When you delete a stage or a pipeline, its leads aren’t deleted, but they disappear from the board. You’ll only see them in Client, when you open each customer’s chat: with no stage, or under “No funnel” if you deleted the pipeline. The delete warning doesn’t remind you of this, and it can’t be undone.
With your stages ready, learn how to move your leads on the sales kanban board.